
Home » Learn about Woodland Stewardship » Working with a Chainsaw in Your Woods » Felling and Processing Trees
Felling and Processing Trees
Felling and Processing Trees
Related webpages
You’ve got your personal protective equipment and you’ve checked your saw to make sure it’s in good shape—now it’s time to get out into the woods! This webpage gives an overview of all the key steps in using a chainsaw to fell and process trees, from starting the saw to cutting downed logs into smaller pieces. You’ll also learn about dealing with compression and tension forces and how to avoid kickback.
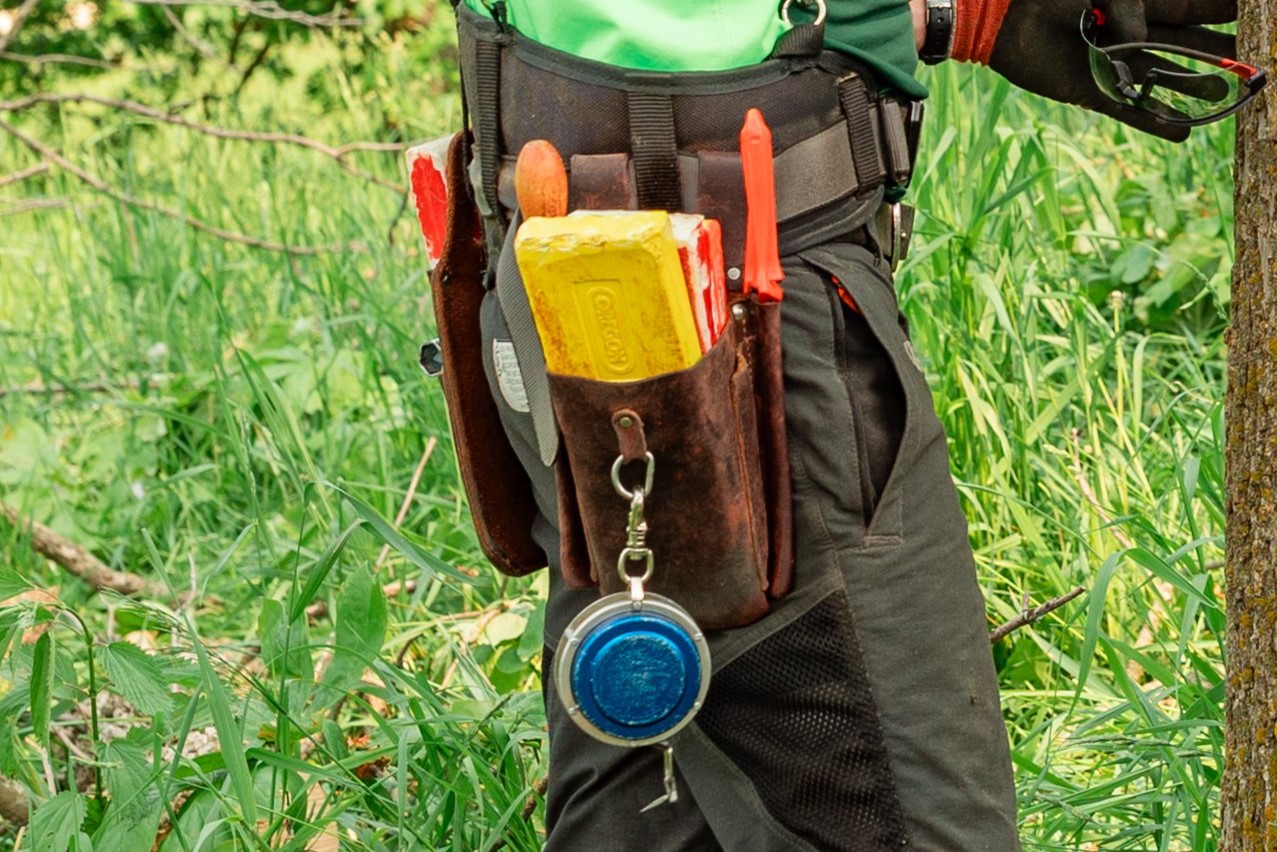
Checklist of equipment to bring into the woods
Before you pack up and head out to your woods, it’s a good idea to make sure you have everything you’ll need. Here is a checklist you can use as a starting point:
- Chainsaw, with sharpened blade
- Spare chain, sharpened (a dull spare adds work in the field that could have been done back at the shop)
- Fuel, with the right oil mixture
- Bar oil
- Plastic wedges
- Hatchet or axe
- Protective helmet, with face shield and hearing protection
- Chainsaw chaps or pants
- Work gloves and boots
- Chainsaw wrench
- Cant hook or peavey
- Sharpening equipment: file, raker gauge, stump vise (if you use one)
- First aid kit
- Water or energy drink
- Lunch or energy bar
- Towel, for sweat and quick clean-up before getting back in the vehicle
- Phone or radio
- A coworker (don’t work alone in the woods).
The last one can be the hardest to find for many folks working in the woods. However, there are ways to make sure you are not out in the woods alone. An in-person coworker is the best scenario. The next best is someone you can contact in case of an emergency. Ideally that person knows where you will be and when you will be finishing up for the day. Setting up a check-in time during the work day is also a good idea.
Starting a chainsaw safely
Always do a last-minute check of your saw before starting it. Ensure that:
- There are no loose nuts or cracks in your bar,
- The chain break/hand guard are intact,
- You have sufficient fuel and oil, and
- Your chain has the proper tension.
Set the saw on cleared, level ground, and ensure that there are no objects that can come in contact with the bar and chain. Place the toes of your right foot in the throttle guard/rear handle for stability. If you are tall, you may want to kneel on your left knee to create a more stable position. Grasp the carrying handle firmly with your left hand and push down. Then pull on the starting chord with your right hand.
If you are not in a clear and open area with level ground, then use this second method to start your saw. First, find the best surface to stand on for maximum stability. While holding the carrying handle with your left hand, position the rear handle of the saw between your legs and just above and behind your right knee. Then pull on the starting chord with your right hand.


A gas-powered saw will make a running noise once it is “live,” but for those owning an electric battery-operated saw, these will NOT make noise when live. Remember that a battery-powered saw is on whenever the battery is inserted.
How to fell a tree
Step 1: develop a plan
The first step in the process of felling a tree is to develop a plan based on where and how you want to fell the tree and any hazards that you need to consider. Begin by making a quick evaluation of the tree. Look for potential hazards like:
- Hanging broken branches or tree tops (aka widowmakers)
- Tripping or obstructing hazards on the ground around the tree
- Surrounding trees that may impede the fall of your tree
- A heavily sloping terrain or poor footing around the tree
- Any obvious signs of rot within the tree.
If any of these hazards exist, it is a good idea to reevaluate your need to fell that tree and/or bring in a professional to do the job.
If you don’t spot any potential hazards, the next step is to walk around the tree and try to determine which direction the tree is leaning, which side of the tree has most of the weight, and ultimately where the tree “wants” to fall. Take this information into account when deciding upon your target direction and the size and placement of your felling notch. Also establish an escape route you will follow once the tree starts to fall.
Step 2: prepare the tree for felling
Get your tree ready to fell by removing all the lower branches. This allows you to easily move around the tree and see where you will be cutting the trunk. It will also make it easier to clearly see and aim for where you want to drop the tree.
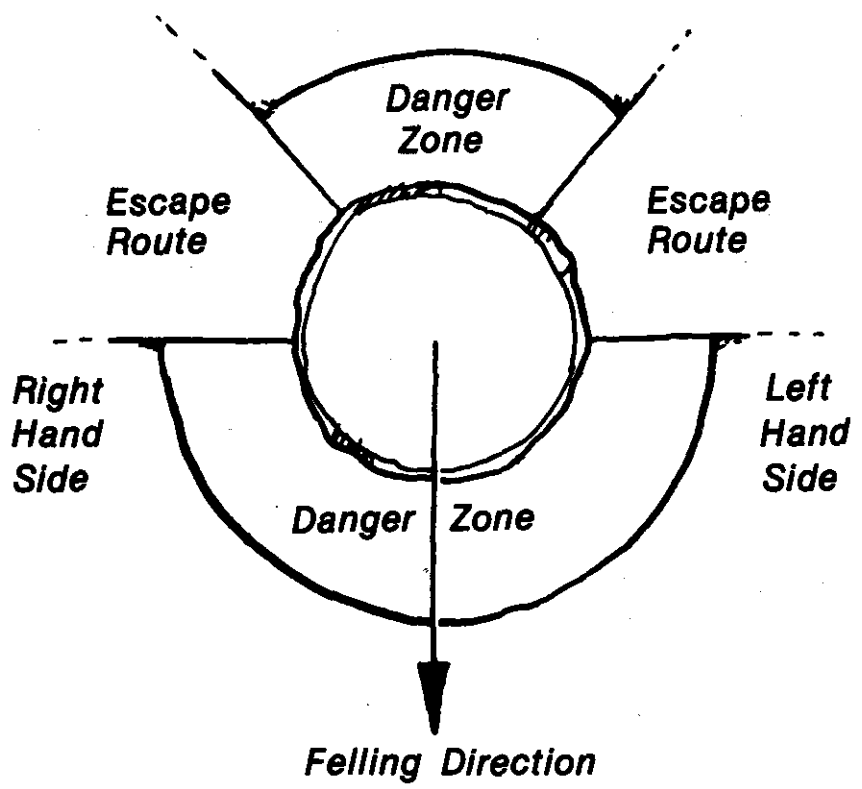
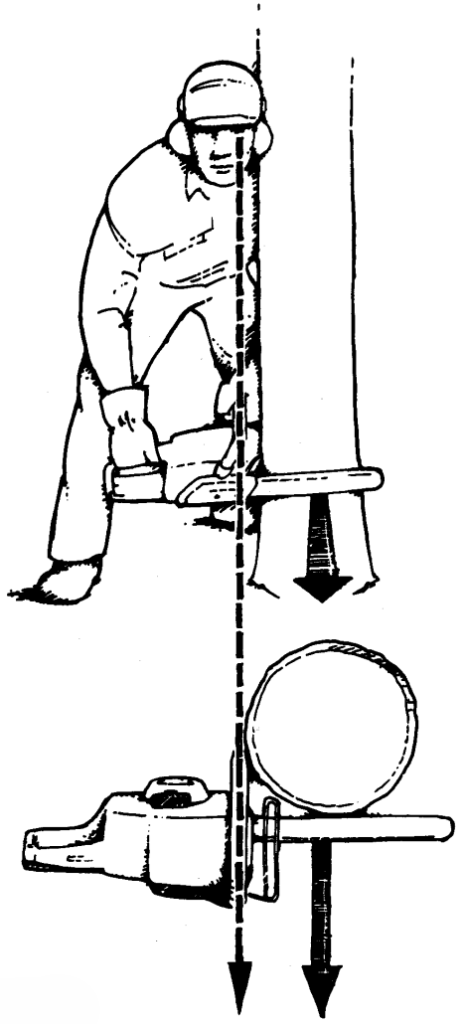
The notch or directional cut is the critical part of the felling process. If it is too small or not aimed properly, it could result in a tree that falls uncontrollably. To ensure your notch will cause the tree to fall in the desired direction, stand behind the tree and point the front handle of your chainsaw in the direction of the desired fall (see diagram).
Then create a notch with two cuts. Start with your “top cut” by cutting down and into the tree at an angle of 70 degrees, and go until you’ve gone in about ¼ of the tree’s diameter. The second cut will be your “bottom cut”: cut horizontally into the tree using the “pull” portion of the bar, running the saw to meet the ending point of your top cut. These two cuts will create a triangle or wedge shape, and you will be able to remove a ~45-degree notch opening in the tree (see video below).
Step 3: fell the tree
With your directional notch in place, now you need to decide whether to use a back cut or a bore cut (also called a plunge cut). The back cut is the simplest one to use and is appropriate for felling trees of a smaller diameter. The bore cut is the safest one to use since you have more control over when the tree starts to fall. In both cases, you will need at least an inch of wood between the notch and the felling cut to act as a hinge and control the fall of the tree. For bigger trees, an inch and a half to two inches of hinge wood is required. It is important to align your felling cut to be just above the bottom of the directional notch.
To execute a back cut, cut into the tree horizontally on the opposite side (the back) from the notch.
The bore cut is much more technical and best learned from a trained professional. To start, plunge the tip of the saw into the tree just behind the notch. When the bar is completely inserted into the tree, slowly cut through the tree away from the notch but not all the way through, leaving a small amount of holding wood just at the outside of the tree. When you are ready to fell the tree, cut that final holding wood to release the tree to fall.
Felling wedges are great tools to use on trees that are larger than the bar of your saw or wanting to fall away from your desired direction. Wedges are designed to keep your bar and chain from getting pinched when making the back cut (or felling cut) and tip the tree over in the direction you want it to fall.
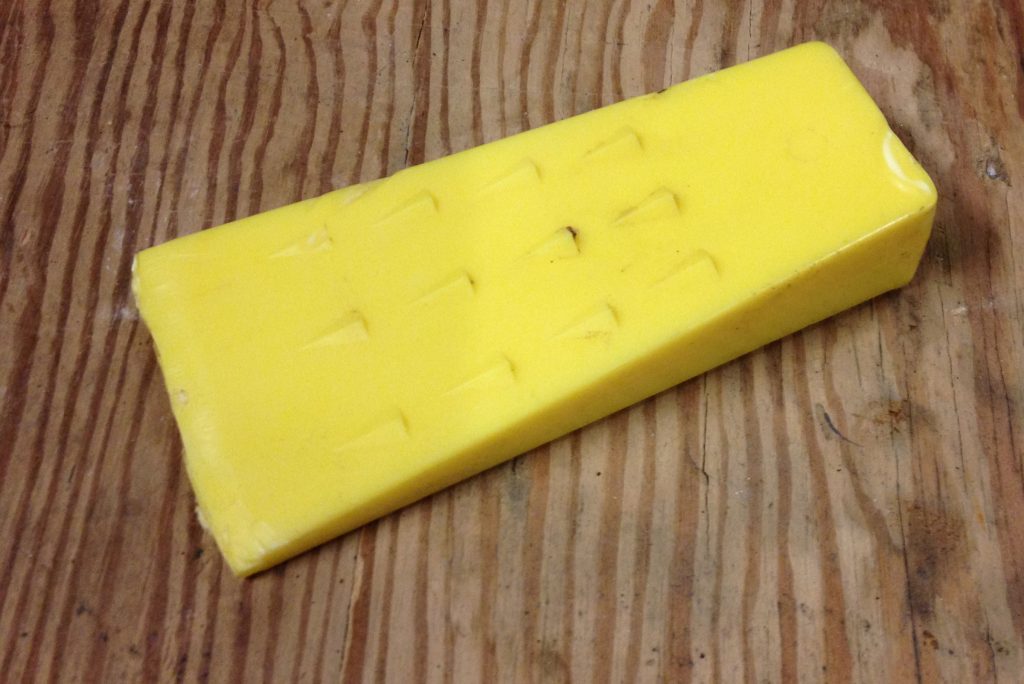
When felling a back-leaning tree, think of your wedge as a lever. You are trying to tip the tree’s center of gravity up and over the hinge. That may seem like a big job for that inch-thick piece of plastic, but in fact the wedge is up to the task.
It works like this: when the wedge is pounded all the way into the back cut so that it is flush with the tree, the bottom of the tree is raised one inch—but the top of the tree moves much further. Depending on the diameter and height of the tree, the tree top can move several feet, changing the tree’s center of gravity in the process.
For smaller trees, one wedge might be sufficient, but for bigger trees you may need three or four. The more wedges you use, the greater the leverage to tip the tree over. Here are the steps in the process.
- Cut the notch as normal, with the notch face pointing in the desired falling direction. Start the felling cut, but stop (and leave the chainsaw in the tree) when there is just enough room in the back cut to insert a wedge without it touching your chain. Position the wedge so that it points in the direction you want the tree to fall.
- Cut a bit more into the tree (without completing the felling cut), and then stop to drive a second wedge 2 to 6 inches to the side of the first. This time, pound the second wedge in with an axe until it is tight, and then do the same with the first wedge.
- Continue this process of alternating cutting into the tree and pounding in the wedges, always being careful to preserve your hinge. If the tree hasn’t begun to fall by the time you have finished the felling cut, you can remove your saw from the tree and continue pounding in the wedges.
Limbing and bucking
Some of the most common chainsaw tasks are limbing and bucking—these are often the first chainsaw activities that folks learn. Limbing is the process of removing branches from a tree, and bucking is cutting larger pieces into manageable lengths. You might do either of these to collect firewood, process a tree after a storm, or to clear a trail or road. Both require attention to safety protocols and an understanding of how the tree’s weight, tension, and support can shift as you cut.
Before any cut, it’s important to pause, evaluate each branch, and make a plan. Ask questions like: Where is the tension here? Is anything pinned? If I make a cut, what will be set loose? Look for bent limbs, hung-up branches, or sections that might roll, drop, or spring.
Position yourself in an active, athletic stance for a strong foundation, either standing or taking a knee. Taking a knee can be helpful when cutting below thigh height to reduce back straining. Maintain good body posture by bending from your knees rather than your back and taking breaks when needed. Stay on solid ground with steady footing and check for hazards overhead. Tools like a cant hook or peavey can help you to roll and maneuver the log flat on the ground before cutting. When bucking, position yourself next to the tree on the uphill side of the log.
When you do finally make a cut, be sure to run the saw at full throttle to ensure the chain moves fast enough to make a clean cut. Never operate your saw above shoulder height. To avoid kickback, make sure you are not cutting with the upper tip (more on this below).
Compression and tension
As you work through cutting firewood, you’ll often deal with trees that are lying on the ground, bent over, or that have branches hanging away from the trunk. These different positions affect how weight within the tree is distributed. Heavy snow, ice, wind, broken limbs, or a fallen tree leaning against another can also affect weight distribution. These situations create uneven forces called compression and tension.
- Compression happens where wood fibers are being pushed together.
- Tension happens on the opposite side where fibers are being stretched and pulled apart.
Recognizing where these forces are acting helps you make the safest cut and predict how the log will react to that cut. The best way to recognize compression and tension is with visual inspection: look at how the log is currently being supported, and then imagine which parts are being squeezed together and pulled apart.
In most situations, the safest approach is to cut the compression side first to release pressure gradually. Cut about ¼ of the way through on that side, then pull the saw out and cut the rest of the way through on the tension side.
By doing it in this order, you’ll prevent the wood from dangerously springing or snapping suddenly, and you’ll prevent the chainsaw bar from getting pinched. A pinched bar occurs when the wood you are cutting closes tightly around the bar. If your saw starts to get pinched, insert a wedge into the cut to keep the space open and help you complete the job.
Remember that compression and tension are not fixed locations on a log—these forces shift depending on how the tree bends and where external pressure or support is coming from. After each cut, take a moment to check where tension and compression are happening before proceeding with the next cut.
Kickback and reactive forces
To stay in control and avoid the dangerous risk of kickback, it’s important to understand the reactive forces as the chain moves around the bar. These forces affect how the bar pulls and pushes the chain during a cut and how it behaves when different parts of the bar come in contact with wood.
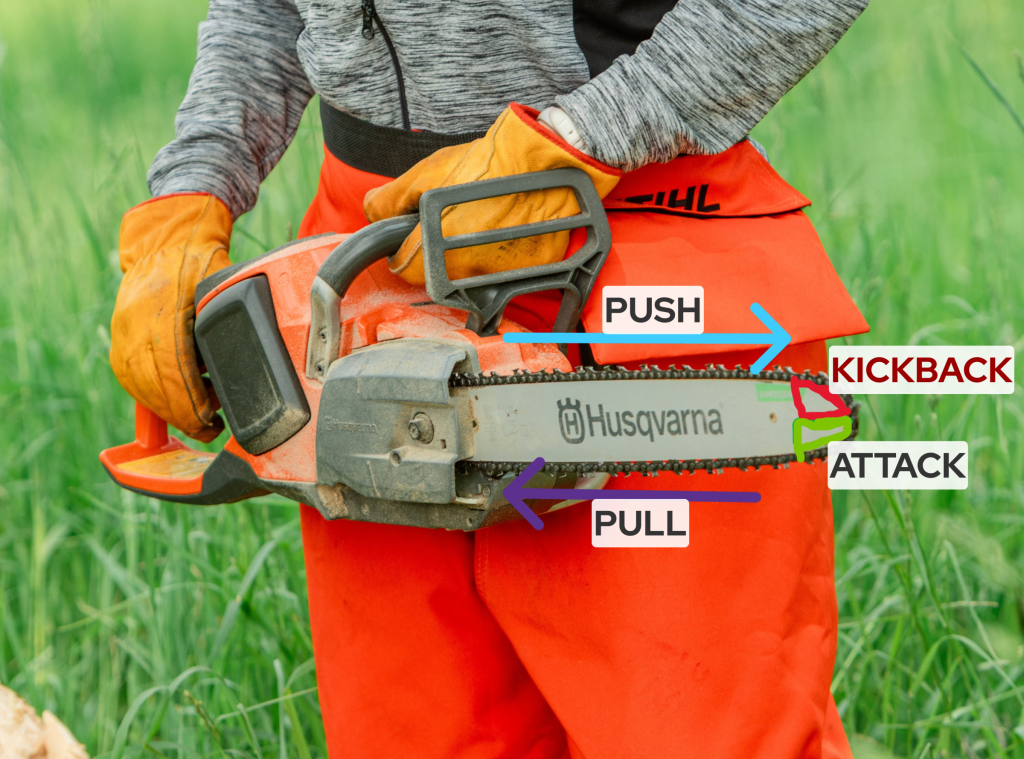
- Push moves the chain along the top of the bar away from you.
- Pull happens along the bottom of the bar, moving the chain toward you.
- Attack is the lower corner tip of the bar- the part that makes initial contact with the wood.
- Kickback is when the upper corner tip of the bar meets wood first, then grabs and causes the saw to jerk up and back toward you. This can cause you to lose control of the saw and get seriously injured.
The push, pull, and attack zones are generally the safest and most controlled parts of the bar to cut with. These are the areas where you’ll make the majority of your routine cuts. For example, when bucking or limbing a log on the ground, you’ll utilize the pull zone along the bottom of the bar, where the chain draws the saw into the cut. The push zone, along the top of the bar, can be used safely to manage tension in a load-bearing branch.
Generally, you should avoid making cuts where you put the kickback zone of the chainsaw’s bar directly against the wood. That’s not to say that this zone is never used—with safety training and experience, some sawyers will make bore cuts using the top tip of the saw.
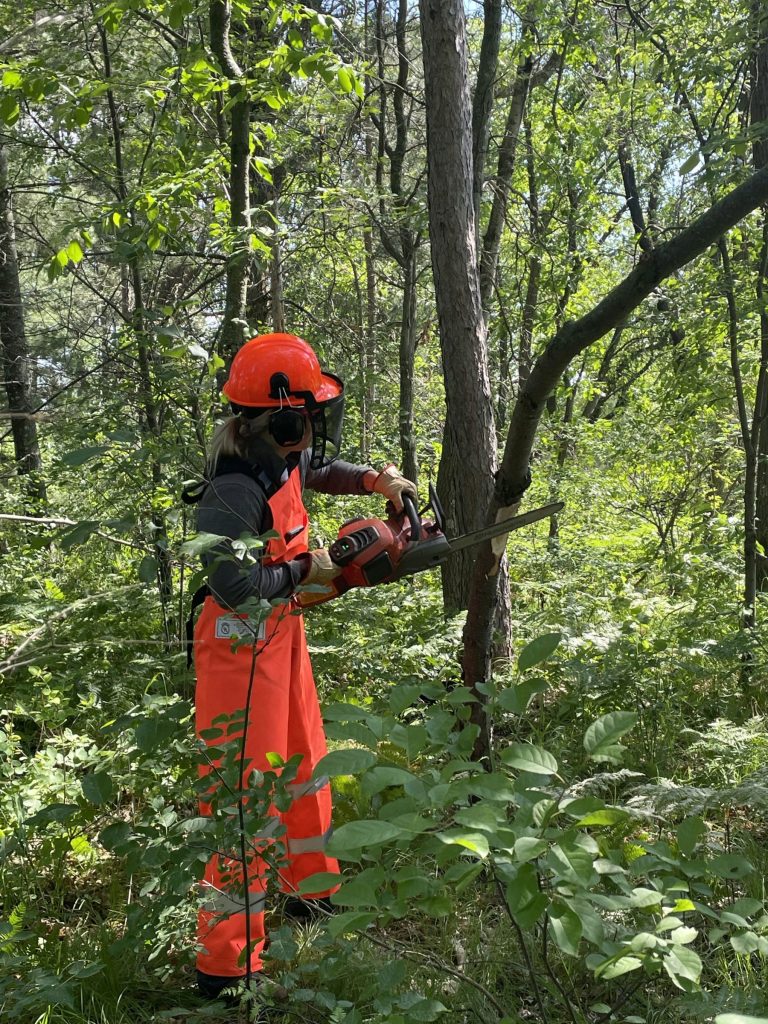
Now that you know the steps in felling and processing trees, here’s a final reminder to make sure you are wearing all your PPE, have a firm grip on the saw, and stand in a stable stance ready for action. If you are ever feeling unsure or just need a refresher, we invite you to join us for a chainsaw safety class. Whether you’re a seasoned user or have never started a saw, everyone could use a little safety refresher before you start your engines!
Further reading
- Basic Chainsaw Safety video (Iowa State University Extension)
- Harvesting Firewood from Your Woods (UW–Madison Extension and Wisconsin DNR, 2012) (PDF)
- Safe Tree Harvesting (UW–Madison Extension, 1991) (PDF)

If you have questions about working with a chainsaw or feedback on this webpage, contact:

Olivia Kovacs
Natural Resources Educator
olivia.kovacs@wisc.edu
608-509-3012
Page written by Bill Klase, Olivia Kovacs, and Scott Hershberger (UW–Madison Extension). Last updated March 2026.
Additional photo credits:
- Two people with fallen tree: Sarah Monson Photography
- All other photos: UW–Madison Extension